How to Install and Monitor Your Solar Systems

At BougeRV, we have got several solar products that take your energy requirements to the next level. We have Solar panels, solar cell chargers, crimping tools, charge controllers, solar extension cable, branch connectors, and a lot more.
Here is a step-by-step (strategic) guide to using each of them:
#1. How To Install Solar Panels with Crimping Tools
About solar panel installation with crimping tools, we have got you covered with the easy-to-use tools.
You just have to order your crimping tool kit through our BougeRV official store, and follow these easy steps:
Connect male and female connectors according to the instructions
Get your wire crimper, cut your wires and attach them as shown in the picture:

Cut the other wire in the same pattern.
Connect both of them with the connector (male and female) you’ve already combined.
That’s it, this is how installing the solar panels take place.
#2. How to parallel the panels with the MC4 Branch connectors.
After solar panel installation with crimping tools, we have MC4 Branch connectors that can parallel the panels and keep the power-up.
Here’s a step-by-step guide to parallel the panels with MC4 branch connectors:
Firstly, keep in mind that these connectors are sold as a pair, also known as ‘Y-Connectors’ and can easily maintain the voltage of solar panel configuration.
There are two connectors including MMF (male one) and FFM (female one).
Just like other connectors, you have to connect both of them and feed them into the solar panel configuration and you’re done.
Installing parallel with panels is as easy as we discussed, but you have to take care whether the connection is waterproof or not. At BougeRV, we have MC4 Branch connectors which are keen to make tight and waterproof connections. Make sure you use them in order to have secure parallel connections.
#3. How to connect the panels and the controller with the solar extension cable?
Next, we have got a question that says it all. From the above two step-by-step guides, we came to know that the cables are pre-made for configuration and you don’t actually require some technical knowledge to get things going, right?
About the panel and controller connection with solar extension cables, you just have to opt for a standard apparatus just like ours solar panel extension cable.
As you get your hands on the controller, you’ll find two sorts of extensions. Out of those two, one has to be connected rightly to solar extension cable while for the second one, you have to connect right into the controller.
Similarly for the panels, we have got pre-made sockets and connectors. Order those from our official store and connect them within a few moments。
For a better explanation, head over to this video guide.
#4. How to control the put out of solar panels with the MPPT solar charger controller?
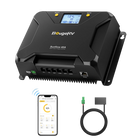
Here comes something that is a bit technical. To control the put out of panels with MPPT solar charger controller, you have to understand how the MPPT solar charger works, look at the image below:
From left, we have sockets for solar panels, then we have sockets for the battery. Both have positive and negative terminals attached.
Remember the rule
“Positive cable goes to the positive terminal while the negative cable goes to the negative terminal.”
As you follow the rule, you will have to connect the positive and negative terminals of your battery to the positive and negative terminals respectively. Look at this suggested video guide to understand how it works. As you go through, you will be able to control panels easily with the traditional MPPT Solar Charge Controller.


