


How to Mount Flexible Solar Panels on a Van?


Flexible solar panels are lightweight, durable, and easy to install on curved surfaces such as Van roofs. They can also save you space and money compared to traditional rigid solar panels.
In this informative blog post, you will discover how to mount flexible solar panels on your Van roof without drilling holes or compromising the integrity of your vehicle. We will also address some frequently asked questions about flexible solar panels and their advantages.
Explore now!
Essential Items and Tools
Before you start installing flexible solar panels on your Van roof, you will need some essential items and tools. Here is a list of what you will need:
-
Flexible solar panels. You can find flexible solar panels in various wattages, dimensions, and designs online or at your local hardware store.
-
Flexible solar panel mounting kit (optional). This kit includes the adhesive, sealant, and wiring that you will need.
You can buy a mounting kit that matches your solar panel size and brand, or you can make your own with the following components:
-
Adhesive and sealant.
-
Wiring. You will need some wiring to connect the panels to your charge controller, battery, and inverter. We recommend using MC4 connectors, which are specially designed for solar systems. They are waterproof, dustproof, and easy to plug and unplug.
-
Charge controller. It prevents overcharging, over-discharging, and short-circuiting of the battery. You can choose between a PWM or an MPPT charge controller.
-
Battery. They are lead-acid or lithium-ion battery on the market available on the market.
-
Inverter. An inverter is a device that converts the direct current (DC) from the battery to alternating current (AC), which is compatible with most appliances and devices. You can choose between a pure sine wave inverter or a modified sine wave inverter.
-
Tools. Some basic tools such as a tape measure, a marker, a drill, a screwdriver, a wire stripper, a wire cutter, and a multimeter are helpful for the installation.
Steps on Mounting Flexible Solar Panels on a Van
Now that you have all the essential items and tools, you are ready to mount flexible solar panels on your Van roof. Here are the steps to follow:
Step 1. Plan the Layout
To begin with, plan how you want to arrange the flexible solar panels on your Van roof. Consider factors such as the direction of the sun, the shape of your roof, the location of vents and skylights, and the length of the wiring. You should also leave some space around the solar panels for ventilation and maintenance.
Use a tape measure and a marker to mark where you want to place the panels on your roof.
Step 2. Clean Your Roof
The next step is to clean your roof thoroughly before applying the adhesive. Remove any dirt, dust, grease, or debris that might interfere with the adhesion. You can use soap, water, and a sponge or cloth to clean your roof. Make sure to dry it completely before proceeding to the next step.
Step 3. Mount the Flexible Solar Panels

You can either screw your solar panels directly onto your Van's roof using a drill or screwdriver, or apply adhesive tape to the back of the flexible solar panels and then firmly stick them onto your Van's roof. At BougeRV, we provide flexible solar panels with pre-drilled holes or adhesive backs.
For mounting flexible solar panels with screws:
-
Put the solar panel where you want it to be installed.
-
Use a marker to mark through each of the predrilled holes on the panel.
-
Use the proper-sized drill bit to predrill holes in the Van.
-
Screw the solar panel into the predrilled holes on the Van roof using a screwdriver or drill with the right size flathead screws or Phillips.
For mounting flexible solar panels with adhesive:
To apply adhesive tape to the back of the flexible solar panels, you need to peel off one side of the tape and adhere it to the rear side of the solar panel.
Next, remove the other side of the tape and press the solar panel firmly onto your roof. Repeat this process for each solar panel you plan to install. With BougeRV’s CIGS flexible solar panels designed with adhesive backing, you can simply peel off the protective layer and attach the flexible solar panels securely to your Van roof.
And remember, don’t apply the adhesive around the perimeter of the solar panels, as it may lead to air being trapped beneath. When the solar panels warm up, these air pockets can swell, potentially causing harm to both the panels and the RV roof.
Step 4. Connect the Wiring
Connect the wiring from the solar panels to your charge controller, battery, and inverter. Use MC4 connectors to connect the positive and negative wires from the solar panels in parallel or series, depending on your voltage and current needs.
After that, you should drill holes in your roof or use existing holes to pass the wires through. You should also apply sealant around the holes to prevent water leakage.
Step 5. Test Your System
The last step is to test your system and ensure everything is working properly. A multimeter can measures the voltage and current from the panels and the battery. You should also check if your appliances and devices are receiving power from the inverter.
If everything is working as expected, you have successfully mounted flexible solar panels on your Van roof. Congratulations!
How to Mount Flexible Solar Panels on a Van Without Drilling?
If you want to mount flexible solar panels on your Van roof without drilling holes or damaging it, you can use one of these methods:
A. Use Suction Cups
Suction cups are devices that use air pressure to create a vacuum seal between two surfaces. You can use suction cups to attach flexible solar panels to your Van roof without drilling holes or using adhesive tape or sealant.
However, the suction cups are not very reliable or durable, as they can lose their grip over time or due to temperature changes or vibrations. Therefore, you need to check them regularly and replace them if necessary.
B. Use Magnets
Magnets produce a magnetic field that attracts or repels other objects made of certain materials. You can use magnets to attach flexible solar panels to your Van roof without drilling holes or using adhesive tape or sealant.
But the magnets can interfere with other electronic devices or components in your Van or cause damage if they detach while driving. Therefore, you should use them with caution and supervision.
C. Use Velcro
Velcro is a type of fastener that consists of two strips of fabric with tiny hooks and loops that stick together when pressed. You can use Velcro to attach flexible solar panels to your Van roof without drilling holes.
D. Use Adhesive Tape
As mentioned, you can mount the flexible solar panels on the Van without drilling holes by using adhesive. Alternatively, use a flexible solar panel mounting kit that comes with brackets, screws, washers, and nuts. This way, you can also attach the solar panels to the roof rack or crossbars of your Van without drilling any holes.
Why Flexible Solar Panels for Van Roofs?

There are several advantages of using flexible solar panels, such as:
-
Thin and Lightweight. Flexible solar panels are thin, low-profile, and low-windage, which means they won't add much weight or drag to your Van.
-
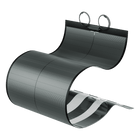
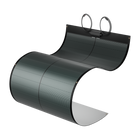
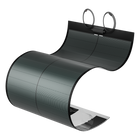
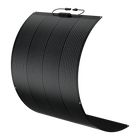
Flexible and bendable. Flexible solar panels can contour and flex against curved surfaces and fit into tight spaces. For example, BougeRV’s 360° flexible solar panels are ideal for mounting on a Van roof.
-
Flexible solar panels are durable and resilient to handle impact and vibrations better than rigid ones.
-
Flexible solar panels are easier to install and remove due to their flexible and lightweight design. Unlike large and bulky rigid solar panels that need mounting hardware, you only need adhesive or high-strength tape or flexible solar panels with adhesive designs.
Conclusion
With our step-by-step instructions mentioned above, you're now equipped to install flexible solar panels using screws or adhesive without drilling, preserving your Van's integrity.
Refer to our helpful blog whenever you need guidance on installing your flexible solar panels. Visit BougeRV.com to explore our high-quality solar panels and solar accessories for your installation needs!
FAQs
1. What Is the Best Adhesive for Flexible Solar Panels?
For metal roofs, you can use epoxy glue or silicone sealant. For rubber or fiberglass roofs, you can use polyurethane glue or acrylic sealant. For fabric roofs, you can use fabric glue or spray adhesive.
2. Do You Need an Air Gap for Flexible Solar Panels?
An air gap is a space between the solar panel and the roof that allows air circulation and heat dissipation. An air gap is beneficial for flexible solar panels because it can prevent overheating and improve efficiency. However, an air gap is not necessary for flexible solar panels if they have a good ventilation system or a low operating temperature.
3. How to Keep Flexible Solar Panels Cool?
Keeping flexible solar panels cool is important because high temperatures can reduce their performance and lifespan. There are some ways to keep flexible solar panels cool, such as:
-
Installing them on a roof rack or crossbars creates an air gap between the panels and the roof.
-
Use a fan or a blower to circulate air around the solar panels and remove excess heat.
-
Applying a reflective or white coating to the panels or the roof to reduce heat absorption.
-
Avoid direct sunlight or shading the solar panels when not in use.


