How to install solar panels on your roof?

If you are considering installing a solar system in your home for some time, then the best time is now as the cost of the solar panels has gone down drastically over the years and so has the price of the solar system. The solar system is now cheaper, time-tested, and financially viable. Governments are also providing various incentives to encourage the adoption of more and more solar systems by homeowners.
But before taking any decision, it would be prudent to know a few basic things with little research about solar panels and the type of roof your property has. One should be also aware of the types of solar rooftop systems, local rebates, and financing options.
That will help you to finalize the best suitable system for you and to ask the right questions in negotiating the contract with the solar supplier or installer.

Types of solar panels in the market
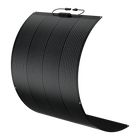
There are three main types of solar panels predominantly available in the market. They are mono-crystalline, poly-crystalline, and thin film solar panels. Mono-crystalline solar panels are the most efficient. For example, a 200W 9BB mono crystalline solar panel by BougeRV is 22.8% efficient. That means this panel is capable to provide more energy in a short time and also occupies less space. This also means a lesser number of panels, fewer mounting systems, and less wiring. That reduces the overall cost of the system.
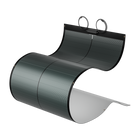
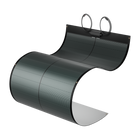
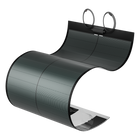
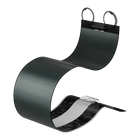
Then comes the poly-crystalline solar panels which are 18-19% efficient and thin-film solar panels which are less efficient than the poly-crystalline panels. Some thin-film panels are flexible and have other uses and advantages.
Know your type of roof to find a racking system
To install a rooftop solar system, it is always better to know the type of roofs your property has. There are five most common types of residential roofs depending on the materials used for them. They are:
- Shingles
- Metal
- Tiles
- Wood roofing
- Concrete Flat or low slope roofs.
Asphalt shingles are the most widely used roofing material for American homes for their easy availability, affordability, and durability. Ceramic tiles are the most durable, but they are more expensive than metal and wood.
The racking system to fix the solar panel on the roof depends on the type of roof. There are flashing, clamps, and tie hooks to attach the racks to the roof. The flat roofs can also use similar hardware with tilt legs to get the required angle for solar panels. Ballast racks, which are kept using dead weight blocks, are another option to avoid any drilling on the roof.
The quality of the racking system is important here to keep your investment, which means solar panels, fixed on the roof for a safe, durable, and fully waterproofed system.
Types of solar systems and various financing options
Depending on your location, budget, and preference, one may go for a grid-tied system or an off-grid system. In the case of a grid-tied system, the solar system will be connected to the local utility grid. In the case of an off-grid system, the solar system is not connected to the grid, and it will have batteries to store energy for use at night or on any non-sunny days.
Inverters used for the grid-tied system are different from the off-grid system as they are designed for two different requirements. In the case of a grid-tied system, the inverter must follow the local grid codes and standards for safety. Grid-tied systems are cheaper than off-grid systems as they do not need batteries. But both systems have their own pros and cons and profitability.
Options for finance are lease, loan, own finance, or power purchase agreement. There are government incentives like federal ITC, local solar incentives, government rebates, clean energy finance schemes like PACE, and Solar Renewable Energy Certificates (SRECs).
How to install solar panels - step by step
The process to install solar on your roof can be divided into two distinct phases – pre-contract signing and post-contract signing.
1. Steps in the pre-contract phase
In the pre-contract phase, you do your own research to know the basics of solar systems, load assessment, site and capacity assessment, quality standards, safety issues, local government requirements, system profitability, and financing modalities. Then comes the vendor selection where you do due diligence in selecting the right solar system supplier or installer in your area. Part of it is already covered above and BougeRV can help you further in this phase.

Fig 1: Steps in the pre-contract phase for installation of a solar system
2. Steps in the post-contract phase
Once you have selected the solar system supplier in case you are going the DIY way or an installer, you sign the contract. After the contract signing, there are certain steps to be followed, that you need to be aware of. These steps will be slightly different depending on the type of system you choose to install. Meaning grid-tied or off-grid type system.
Following steps to be followed in the post-contract phase:
- Engineering site survey
- Getting permits and furnishing all documents
- System procurement
- Installation of the solar system
- Final approval and interconnection
As mentioned above, if the system is an off-grid one, the solar system in your home is not connected to the grid, and electricity produced by the solar panels will be entirely consumed by your house only. Therefore, steps A) engineering site survey, B) getting permits and documentation, and E) approval and interconnection are not required.

Fig 2: Steps in the post-contract phase for installation of an off-grid system
But in the case of grid-tied systems, the solar system will be connected to the local electricity grid. Electricity produced by the solar system is not consumed by your home load and will be exported to the grid. At night time, your home load will draw electricity from the grid. Electricity flows both ways here – mostly exported in the daytime and imported at night. This will be measured by a bidirectional net meter.

Fig 3: Steps in the post-contract phase for installation of a grid-tied system
As your solar system is a high voltage and current generating system, there are safety concerns for your system as well as the utility grid. To protect both of it, there are technical standards and grid codes that must be maintained. The local grid code (technical standards) may vary depending on your locality.
We strongly recommend you take professional help for this. If you choose an installer, then the installer will do all these processes without you bothering for all these nitty-gritty and compliances.
A. Engineering site survey
You have already done the preliminary site assessment and capacity assessment during the pre-contract phase. But after the contract, the installer will send an engineer to your home to assess the structural soundness of your roof and the internal electrical wiring and electrical panel box in your basement. He/she will also do the final shadow analysis of the roof and take the exact measurement of the shadow-free area, the place for the inverter and other accessories to install, and cable length.
The type of roofing material and the structural soundness of the roof is important for wind loading. Basic wind speed again depends on your locality and there are certain local building codes to be followed. All these will decide the type of racking systems suitable for the solar panels to be fixed.
For the aesthetic aspect and any of your preferences, he/she may take your final consent or opinion.
B. Getting permits and furnishing all documents
For a solar system to be installed, a lot of paperwork is involved. Especially for a grid-tied system, there are several stakeholders like below:
- you as a homeowner,
- your local utility as the solar system is interconnected to the grid,
- federal and local government for tax rebates and solar incentives,
- municipality or local body for its fire and electrical safety, aesthetics, etc.
For each of the stakeholders, there are different sets of documents to be filled up and required to be submitted. These checks and approvals are necessary for the safe and reliable operation of the solar system. These processes take some time. You can assume one to three months for the whole process depending on your location and government processes.
But if you hire an installer, they will take care of most of the paperwork on your behalf. Luckily, they will fill up most of the papers and only take your signature.
At this stage, a different set of officials from the local utility and municipality will visit your place to verify the information submitted and to give approval. These are routine checks and if they do not find anything substantially deviated from what is mentioned in the documents, they will approve it.
C. System procurement
The system specifications are already decided before the contract signing, and exact specifications and standards are already written in the contract. Solar panels, inverters, and roofing racks are the most critical components. Other parts like cables and small connectors are also equally important. But in terms of cost, solar panels are the most critical as it the most expensive ones. 50-55% of the system cost will be for solar panels only. Moreover, solar panels will generate electricity for the next 25 to 30 years period. 200W 9BB mono-crystalline solar panels are one of the best in the market that you can check. These panels are 22.8% efficient. That means it requires less space and generates the maximum amount of electricity for its lifetime.
Inverters are also critical as it converts the DC electricity produced by solar panels to usable AC electricity. There are stringent quality standards and grid codes for electrical safety for the property as well as the utility grid.

D. Installation of the solar system
Once the approvals from various authorities are in place, the installer can start the installation process. The approval process from the utility and municipality may take one to two months. Depending on the workload of the installer and their existing projects in the pipeline, the installer will schedule the installation dates.
The day of installation is an exciting day for the homeowner as you are taking a significant investment decision to go towards cleaner energy and future savings.
The actual installation process takes 2 to 3 days and that depends on the size of the system, type of roof, and racking system. Grid-tied systems are easy to install than off-grid systems as it has additional components like batteries.
E. Final approval and interconnection
After the installation has been completed, your solar system is ready to be interconnected to the utility grid, if it is a grid-tied system. But before that local government’s approval is required. At this stage, your installer will inform the readiness of the solar system to the local authorities so that they can come and inspect it.
A person from the local government will then come and inspect your solar system to ensure that everything is in place and the installation has been done as per the local guidelines, standards, and norms.
Once this is done and gets approval then a representative of the local utility company will come and inspect the system. This inspection is to ensure the electrical and fire safety of the system as well as the safety of the grid so that system can run safely and reliably for its lifetime.
Once this inspection is done and unless the system has some stark irregularities, your solar system will be connected to the grid. The solar system goes live and starts producing electricity.
Conclusion
A rooftop solar system is an affordable and reliable system now that generates clean energy at a cheaper price. That too will do this for 25 long years. An off-grid solar system with battery backup is stand-alone and not connected to the utility grid. You may go for DYI mode to reduce cost. But grid-tied systems are connected to the utility grid. Voltage, current, frequency, load balancing, and electrical safety are major concerns for the management of a large electrical grid. There are stringent grid codes and need a licensed person to handle that. We recommend you hire an experienced installer for a grid-tied system.
At BougeRV, we are dedicated and experienced to guide you both in the pre-contract phase and the post-contract phase for the installation of solar panels on your roof. Just fill out our “Get in Touch” form here and our team will contact you within 24 hours. Our one-on-one service is non-binding and completely free.


